Showing posts with label contributors. Show all posts

Friday, April 19, 2013

Food: ChickPea Fries

Hi MadeByGirl readers! Its Teann from Teann Ingram Photography. Whenever I go to a restaurant, I always walk in thinking, I'll try a new item on the menu. But when the waitress comes to take the order, I panic and go with something classic instead. Last week, I actually tried a new item! Chickpea Fries, which I fell in LOVE with. 

They are somewhat healthier than regular potato fries, though they are normally deep-fried so I think that might cancel out the "health" factor. Luckily, you can bake these fries too!


You can buy chickpea flour from a specialty store (I've heard Whole Foods has it in bulk) or grind dried chickpeas in a coffee/spice grinder, like I did here.


Remember to slowly sprinkle in the flour mixture while whisking constantly to avoid clumps. Switch to a wooden spoon and continue stirring until the mixture starts to separate from the walls of the pot.


While the chickpea mixture is cooling in the fridge, make the curry aioli. Make sure to SLOWLY add the oil to the egg yolk. This is the most crucial part.


Oh yum, look at the colour of those fries!

Now enjoy!

Chickpea Fries
1 cup chickpea flour, sifted 1 tsp salt 1/4 tsp pepper 1 tsp smoked paprika 1 1/4 tsp turmeric 2 cups water 2 tbsp olive oil Favourite oil for frying (I use peanut)

Curry Aioli *Note: This aioli contains raw egg yolks.
3 egg yolks pinch of salt pinch of pepper 1/2 lemon 3/4 cup lightly flavoured oil (I use safflower) 3/4 tsp turmeric 1/4 tsp cumin 1/4 tsp coriander

1. Grease an 8x8 square dish, set aside. Mix water with olive oil in a medium saucepan and bring to a boil. Meanwhile, whisk together chickpea flour, salt, pepper, paprika, and turmeric in a large bowl. Once the water is boiling, gradually add the flour mixture, whisking frequently to avoid lumps. Switch to a wooden spoon and continue to stir for about 5 - 7 minutes, or until the mixture separates from the sides of the pan. Pour mixture into the greased dish. Smooth and level with a wooden spoon. Set aside to cool for 10 minutes before placing in the refrigerator.

2. *If using the oven method, preheat oven to 425˚F. While the chickpeas' are cooling, its time to make the aioli. You can certainly whisk by hand, but its takes quite an effort. Instead, I use my KitchenAid mixer. (You can also use a blender or a food processor). Place the eggs in the bowl with the whisk attachment. With the mixer on high speed, SLOWLY add the oil to the eggs, one drop at a time. Wait for the oil to be mixed with the eggs before adding the next drop of oil. Continue this process until the eggs lighten in colour and the texture starts to thicken slightly. Once you have hit this stage, you can start pour the oil in a thin steady stream until all of the oil has been added. Add the rest of the spices and mix well. Store in the fridge until ready to serve.

3. Heat 1 inch of oil in a skillet over medium heat. Cut the chickpea mixture into strips, about 4 inches long and 1/2 inch wide. Fry strips on both sides until golden brown, about 3 minutes per side. Remove from oil and drain on paper towels. Place fries in a warm oven, while frying the next batch. Serve immediately with curry aioli.

*4. Line baking sheet with parchment paper and place chickpea strips, leaving 1 inch space between. Bake for 18 - 20 minutes or until crispy. Serve immediately with curry aioli.


-post by teann ingram

Tuesday, April 16, 2013

Design: Office Inspiration

Hello, hello!  It's Sam from The Peak of Très Chic, back with another lovely dose of decor.  I recently participated in the One Room Challenge with 20 other design bloggers across the country.  We were each given the task of designing a room within a tight 6 week timeline, and sharing our gradual progress with readers each week.  

I chose to design a home office, and in the process of research became quite inspired by chic desktops and desktop accessories:


Although the office I designed for the challenge was quite bold and textured, I've recently become more drawn to streamlined, less-cluttered offices, with just a few pops of color:


Shop This Office:

Colored Pencil Set with Brass Holder $82/Lola Donahue Fashion Illustration $30/Gem Lamp in Steel Blue $165/Z-Gallerie Lacquer Desk $499/Clayton Home Lucite Chair $380/Green Leopard Lumbar $165

I've been eyeing that leopard lumbar for weeks now.  It would be such a fun pop of color when paired with a lacquered desk and lucite chair, don't you think?


{All office images above via Lonny Magazine}


Tuesday, April 9, 2013

Food: The Best Egg Sandwich Ever

Hi you guys! Lauren here, with the BEST egg sandwich you'll ever eat (seriously). I'll pre-apologize to any vegetarians out there, because the key ingredient here is bacon. Specifically, bacon jam... We recently came across this magical substance when eating lunch at one of our favorite neighborhood cafes, and my husband didn't waste any time trying to make it himself at home. 

It's nothing short of delicious and a serious upgrade to the regular old egg sandwich. I mean, what's not to love about bacon--in jam form--on an egg sandwich after all? It's surprisingly simple to make (promise!), so keep reading for the recipe... 

open-faced micheopen-faced miche

First things first, you chop up the bacon and cook it. Then you're going to cook it down with onions, garlic, brown sugar, maple syrup, balsamic and grainy mustard. It's eventually going to turn into a jam as it slowly cooks...  

Bacon Jam Ingredients
1 12-ounce package of center-cut bacon, diced
1 cup sliced onions, half red and half white
2 cloves garlic, minced
1 tablespoon bacon grease from cooking (discard the rest)
1/4 cup packed brown sugar
3 tablespoons maple syrup
1 tablespoon balsamic vinegar
1 tablespoon whole grain mustard
1/4 cup chicken stock, plus 1 tablespoon

Bacon Jam Instructions
1. Cook bacon over medium-low heat, until cooked but not crispy. Discard the bacon grease, but reserve 1 tablespoon of it.

2. Back in the pan, cook onion and garlic in the reserved bacon grease until softened. Add brown sugar and coat the onions.

3. Add maple syrup, balsamic vinegar, mustard and chicken broth. Fold in the bacon and simmer until reduced, about 5 minutes. After thickened and jammy, add the extra tablespoon of chicken stock to thin it back out just a bit.

4. Transfer the bacon jam mixture to a food processor and pulse, just until your desired jam consistency. Store in an airtight jar or container, in the refrigerator, until ready to use.

open-faced micheopen-faced miche

Egg Sandwich Ingredients
Bacon jam
1 slice of miche (large round loaf of French sourdough bread), toasted
2 slices of gruyere 
1 kale leaf, torn and sauteed until crispy
1 fried egg

Egg Sandwich Instructions

1. Spread bacon jam on toast.

2. Top with gruyere slices, kale and fried egg.

3. Close your eyes and take a big, delicious bite! 


-post & photos by lauren craig

Thursday, April 4, 2013

Design: The Entryway

Hi MadebyGirl readers, Sam here with another fabulous dose of decor.  Today's post is focused on one of my favorite rooms in a house: the entryway!


  I so adore entryways because they are the first room guests see when they arrive, and often set the tone for the rest of your home. I love to see meaningful items in an entryway, such as family photos, antiques, and other tchotchkes that represent you and your loved ones well.  This gives the entry a personality and tells a story to your guests.


An entryway allows for bold creativity and the ability to express design elements you would be to timid to use in your living or family rooms. Entrance halls are actually the perfect area to unleash your creative design daredevil and go bold, brave and creative.


If I were to re-design my entryway, I think I'd go for bold geometric flatweave rug, slipcovered chairs, and Orangerie Rose throw pillows:


Shop This Board:


How do you like to dress up your entry hall?  Do you go for bold accents or keep it more subdued?


-post by samantha penner


Tuesday, April 2, 2013

DESIGN: Outdoor Lounging Inspiration

Spring has arrived! And even if it's still a little too chilly to be lounging & dining al fresco, that doesn't mean we can't start planning! Hello MBG followers. Katie here, from H2 Design, ready to share some of my favorites for your outdoor decorating and dining needs.

First up... some inspiration!

outdoorlivingviaEmilyHenderson

 via Emily Henderson.
 
outdoorliving

 via El Mueble.
 
alfresco
via here.

And now let's have some fun creating our own...
alfrescodining_H2Design


What are some of your outdoor necessities for the season?


-post by katie hackworth


Friday, March 29, 2013

Design: Snakeskin + Magenta

Hi MadebyGirl readers!  Sam here, with another home decor post.  Lately I have been crushing on a new chic combo for the home- bold magenta and snakeskin.  I have always felt that animal prints can serve as neutral tones, and work well mixed in with bold colors.
 
I've been on the hunt lately for fun ways to incorporate this combo in to the home.  Here are a few of my recent finds:
 

1.) Faux Python Tray $55
2.) Agate Coaster Set $64
3.) Homesense Snakeskin Frame $12.99
4.) Arianna Belle Magenta Velvet Throw Pillow $75
5.) Pink Ikat Cocktail Napkins $12
6.) Pink Gem Lamp $165
7.) Jayson Home Faux Snakeskin X-Bench $476


One thing's for sure- a mix of bold magenta and snakeskin makes quite an impact.  Would you incorporate the look in to your own home?


-post by samantha penner


Wednesday, March 13, 2013

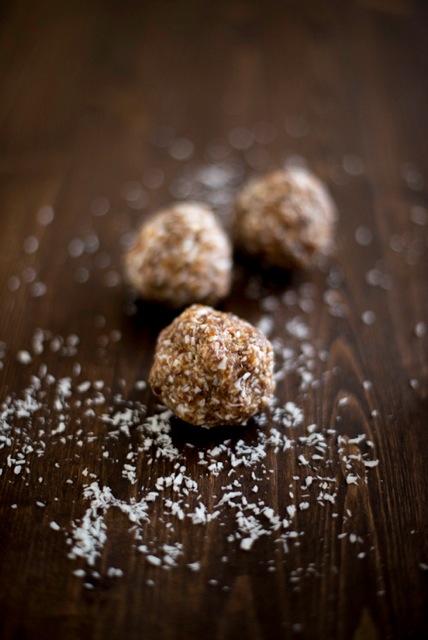
Food: Coconut & Peanut Butter Date Truffles

Hey guys! Its Teann from Teann Ingram Photography. Do you ever have days where you need a pick-me-up snack? Those mid afternoon yawns are such a drag. Most turn to coffee or pop to awaken the mind but I find I feel way better when I eat something instead. These Date Truffles are just the snack to keep your mind going till the end of the work day! 

They are super easy to make and you can add any type of flavoring you want, plus they are all natural and made without sugar and with only a few ingredients :) Below are the recipes for Coconut Date Truffles and Peanut Butter Date Truffles. If you're not a date person, not to worry, all you taste is the goodness of coconut and peanut butter. Yum!


Coconut Truffles - (Makes about 6)
2 cup of dates, pitted
1/4 cup of Almonds, roughly chopped
1/4 cup coconut oil
1 1/2 shredded coconut, unsweetened
1. Start by quickly going through the dates making sure there are no pits left. Even if you buy them already pitted, there are sometimes pieces of the pit hiding. This quick step will save your food processor blade :)

2. Place the dates into the food processor and process until the dates form a large ball. Tear the dates into smaller pieces and add the coconut oil, shredded coconut and almonds. Pulse until combined. You can also use your hands to knead the coconut oil, coconut and almonds together with the dates.
3. Here you can either form truffles or bars. Whichever you prefer :)

Peanut Butter Truffles - (Makes about 6)
2 cup of dates, pitted
1/4 cup of almonds, roughly chopped
1/2 cup natural peanut butter, crunchy
1. Start by quickly going through the dates making sure there are no pits left. Even if you buy them already pitted, there are sometimes pieces of the pit hiding. This quick step will save your food processor blade :)

2. Place the dates into the food processor and process until the dates form a large ball. Tear the dates into small pieces and add the peanut butter and almonds. Pulse until combined. You can also use your hands to knead the peanut butter and almonds together with the dates.

3. Here you can either form truffles or bars. Whichever you prefer :)


-post by teann ingram


Friday, February 8, 2013

Design: Farrow & Ball Wallpaper

Hi MadeByGirl readers, this is Sam from The Peak of Très Chic blog.  I am thrilled to be a new design contributor here on MBG!  In addition to blogging, I attend school and work as an interior designer in Houston- and am so excited to be here!

Today I wanted to share with you a peek at the new line of Farrow & Ball wallcoverings launching February 4!  I am sure many of you have heard of the infamous Farrow & Ball paint colors.   I love them for their high levels of pigment- use just about any F&B shade and you are sure to get a saturated, full color.  

Unlike their competitiors, Farrow & Ball doesn't have 100 shades of every color to choose from.  Instead, they have just over 130 paint colors total, but each shade packs a punch.   True to form, Farrow & Ball's wallpapers utilize the finest pigments and are offered in a variety of motifs.  Here are a few of my favorites:
 
 {Lotus}
{Ranelagh}

{Orangerie}
 
{Wisteria}

{Lattice}

{Ocelot}

And lastly, my very favorite:

{Tessella}

I can picture it making a bold statement in an entryway:
  

Shop This Board:

Tessella Wallpaper $255/roll/Gem Light in Pink $165/each/Curvilinear Console $1,398/Sunflower Antiqued Wall Mirror $330/  Bliss Studio Elgar Chairs $1,563/each/Vintage Kilim Rug $900
  
 Which paper design is your favorite?

Access the wallpapers shown above and check out the full Farrow & Ball wallpaper collection here.


-post by samantha penner


Wednesday, February 6, 2013

Food: Mediterranean Bread

Hi all! I am Teann Ingram and I am so excited to be a contributor on MadeByGirl! Its winter here in British Columbia, and it seems Mother Nature can't decide whether she wants it cold or warm - right now its about -12˚C (10˚F) which is a little colder than I would like! Whenever its chilly out, I find I crave something warm and savory. 

This Mediterranean bread is just the ticket on cold days like this! Besides the fact that it looks gorgeous, the combination of the feta, spinach and chopped walnuts are simply delicious. I will warn you now; you will have more than one slice :)


After kneading, the dough should have an elastic feel to it. Push a finger into the dough and if it springs right back quickly you know your dough is perfect! The dough should be smooth but still moist and not dry.


I could eat just the filling all by itself :)


This dough is extremely easy to roll out. If it seems a little resistant, let it rest a few moments before starting to roll again.


Here is the tricky part. When cutting the bread lengthwise start the cut about 2 inches from the top. It’s easier to braid the dough when the top is still attached. An extra pair of hands help when braiding the dough but if you are by yourself it will just be a little messier. No worries

If some of the filling falls out, just scoop it back up and place it back on the dough.


Mediterranean Bread
Dough
1 tbsp traditional yeast
1 cup warm water (105˚F) 1/2 tsp honey 3 cup all-purpose flour 1/2 tsp salt 1/2 cup feta cheese, crumbled 1 egg 2 tbsp olive oil

Filling
1/2 cup feta cheese, crumbled
1/2 cup cooked spinach, drain excess water - If using frozen, no need to cook.
1/3 cup walnuts, chopped
1 tbsp butter 1/4 cup leek or 1 garlic clove, finely chopped

Directions
1. Combine warm water with honey and mix until dissolved. Add yeast and mix well. Set aside to proof for 10 minutes. While the yeast is proofing, combine flour, salt, and feta cheese. When the yeast is done proofing, add to the flour mixture and stir. Combine the egg and olive oil and then add to the flour mixture. Stir with a wooden spoon until mixture comes together. You can use your hands as well. Place the dough on a lightly floured surface, and knead for approx. 10 min, or until the dough becomes smooth and elastic. Put the dough in a large, lightly oiled bowl and cover it with a cloth. Let it rise in a warm, draft-free area until double, 1 hour.

2. While the dough is rising, prepare the filling. Combine the feta cheese, spinach, and walnuts in a bowl. In a small pan, add the butter and leeks or garlic, sautéing until soft. Add to the filling mixture, stirring until well combined.

3. When the dough has doubled in size, place on a lightly floured surface. Using a rolling pin, roll the dough into a 15x12 rectangle. Leaving a 1 inch border, spread the filling onto the dough. Carefully, roll-up the dough lengthwise. Before cutting, transfer the dough to a baking sheet lined with parchment paper. Using a sharp knife, position the knife 2 inches below the top and cut the dough lengthwise. Carefully, braid the dough, picking up any filling that might have fallen out and place back onto the dough. Place the tray in a warm, draft-free area, covered with a cloth and let rise for 1 hr.

4. After the dough has risen 30 min, turn the oven on to 400˚F and let it warm up while the dough continues to rise. Once the loaf has risen and doubled, bake for 35 - 40 min, until the crust is brown

5. Cool on a rack before cutting. Enjoy!


-post & photos by Teann Ingram


Monday, February 4, 2013

Fashion: Mint + Gold

Hello! I'm Carlinn from Superficial Girls blog & now one of the newest Fashion contributors here on MBG! I'm so very excited to share my first post here on MadeByGirl! Ready? 

I have been loving the sweet combination of mint & gold online! From mint ice-cream to your favorite delicate gold necklace these hues bring out your happiest emotions. Together they create a perfect color palette that I definitely cant resist. They seem to work well together in fashion, decor and even food (mint cupcakes with gold dust anyone?)
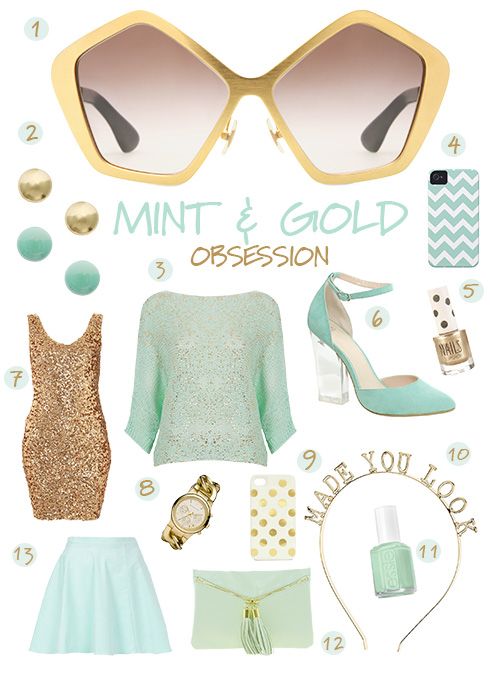


 photo Mintampgoldcollage_zps087b4b9b.jpg
I usually love wearing a mint outfit with splashes of gold in my accessories, but why not have fun with it by matching your nails or adding a mint sweater to a pretty gold colored skirt!
Here are some of my favorite mint and gold picks to help you warm up to this trend.

 photo Mintoutfits_zps77770df5.jpg


-post by Carlinn


Friday, February 1, 2013

2013 Contributors Are....

Congrats Contributors....& Amanda Dietz!! 

Looking forward to working with all of you & some of you for the 2nd time! Enjoy your weekend!

Get to know each of them here!


-image by jen ramos


Friday, January 18, 2013

Contributors Wanted

This Friday we are .....


I have to say, working with contributors has been a great experience. I've made some great friends in the process & hopefully the ladies got some great traffic out of it as well.  With that said, it's that time again to switch out the current contributors & bring in new FRESH FACES & posts! I'm always super busy managing my MBG Shop, painting for my Cocoa & Hearts gallery, marketing, answering e-mail & maintaining my personal life. It's STILL a lot of work, so I'm back searching for the next contributors!
 

I'd love to recruit 5-6 contributors to blog here on Made By Girl!  It's not going to be an easy task - but I'll choose bloggers for each category below. Categories are:
 

  • Decor/Interior Design
  • Fashion/Beauty
  • DIY
  • Food


Below I've outlined more details & what I'm looking for.
 

HOW OFTEN WILL YOU POST:1-2x per month for 6 months. 

EXPERIENCE: 

Yes - Must have an active/updated blog. I'm looking for bloggers who have some knowledge of programs like Photoshop & have a 'similar aesthetic' as Made By Girl. The posts you write for MBG cannot be posted on your own blog, but you can link to it from your blog.


WILL THERE BE COMPENSATION: 
Not at this time. But it's a great chance to gain more exposure and collaborate with MBG blog.

BIO PAGES:We'll be adding a page with photos & short bios of all the current contributors - here's an example. .
 
RESOURCES: 
It's very important to credit 'all' images properly.

PRETTY POST PLS: 
I love pretty & interesting posts. So pls put some LOVE into it! 

HOW DO YOU SUBMIT:
If you you want to give this a try, email me  & let me know 'which category' you're interested in. Write 'Contributors' in the email subject pls. ALSO, pls email me your blog so I can see your style! If you submitted last yr. don't be afraid to submit again!
 

WHEN WILL WE SELECT CONTRIBUTORS:
If you don't hear from someone at Made By Girl in about 2-3 weeks from this post, it means someone else was selected.  Unfortunately, we may not be able to respond to everyone. We will post the selected contributors in an upcoming post!


Thanks & looking forward to hearing from you! 

Friday, January 4, 2013

DIY: Chalkboard stemware

Hi All MBG Readers, Jana here to share a chic & super simple solution for entertaining: stemware with writable chalkboard bases.  A sophisticated way to distinguish ones champagne cocktail when the event is too engaging to keep track.


Materials:

Stemware
Paint Brush
Chalk


Paint the base. I recommend using short brushstrokes. This layer will be thin as you want just enough coverage to create texture for the second layer. This layer will not look attractive but do not worry, it will turn out!


Let dry overnight. Then paint on a second layer of paint. It will look goopy, but again, do not worry, as it dries the paint settles into the shape of the base.


 Let the second coat dry overnight. Now entertain away!


Something to note - do not get the bases wet as the paint will chip. To preserve, wash only the bowl of the stemware. An upside to the somewhat delicate nature is that you can easily wash all the paint off if you want your stemware only transitioned temporarily. 


-post by Jana Bek
-images by Erik Melvin